Unit 2: Take Ownership and Change Artefacts from Another Agency

There are many SDMX artefacts publicly available in other registries. Often, it can be efficient to reuse one of these artefacts in your own organisation – either as-is or with modifications. There are very simple ways to do this using FMR.
Taking ownership and changing artefacts from another agency
To take ownership and change artefacts from another agency, the sequence of steps is as follows:
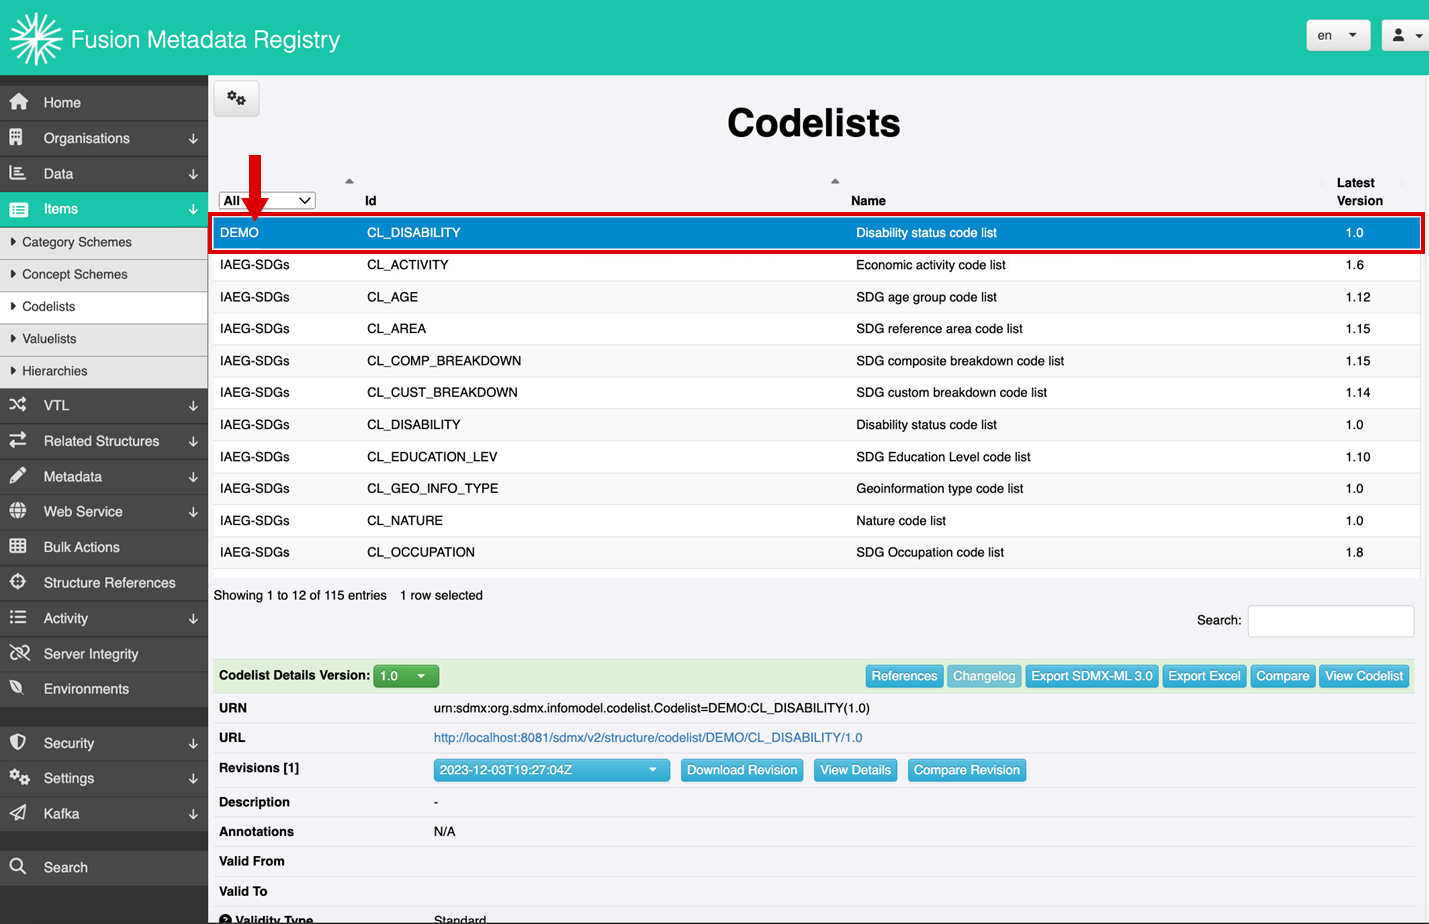
Step 1: Login to FMR and then navigate to Items -> Codelists.
Step 2: Select the codelist to be modified (e.g. CL_DISABILITY).
Step 3: Select the COG button and then the Edit Selected Codelist menu item.
Select the image to enlarge. ![]()

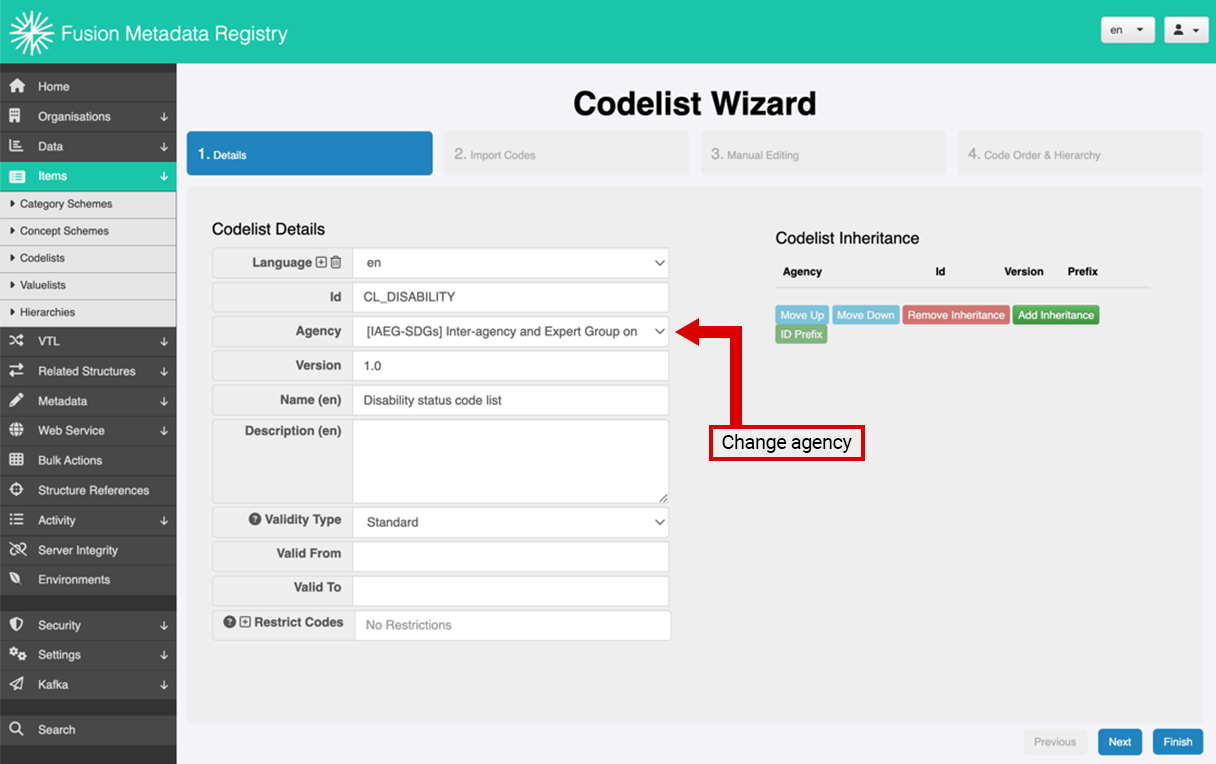
Step 4: In the Codelist Wizard screen, change the content of the Agency field. For this exercise, we’ll change the agency name to DEMO.
Select the image to enlarge. ![]()
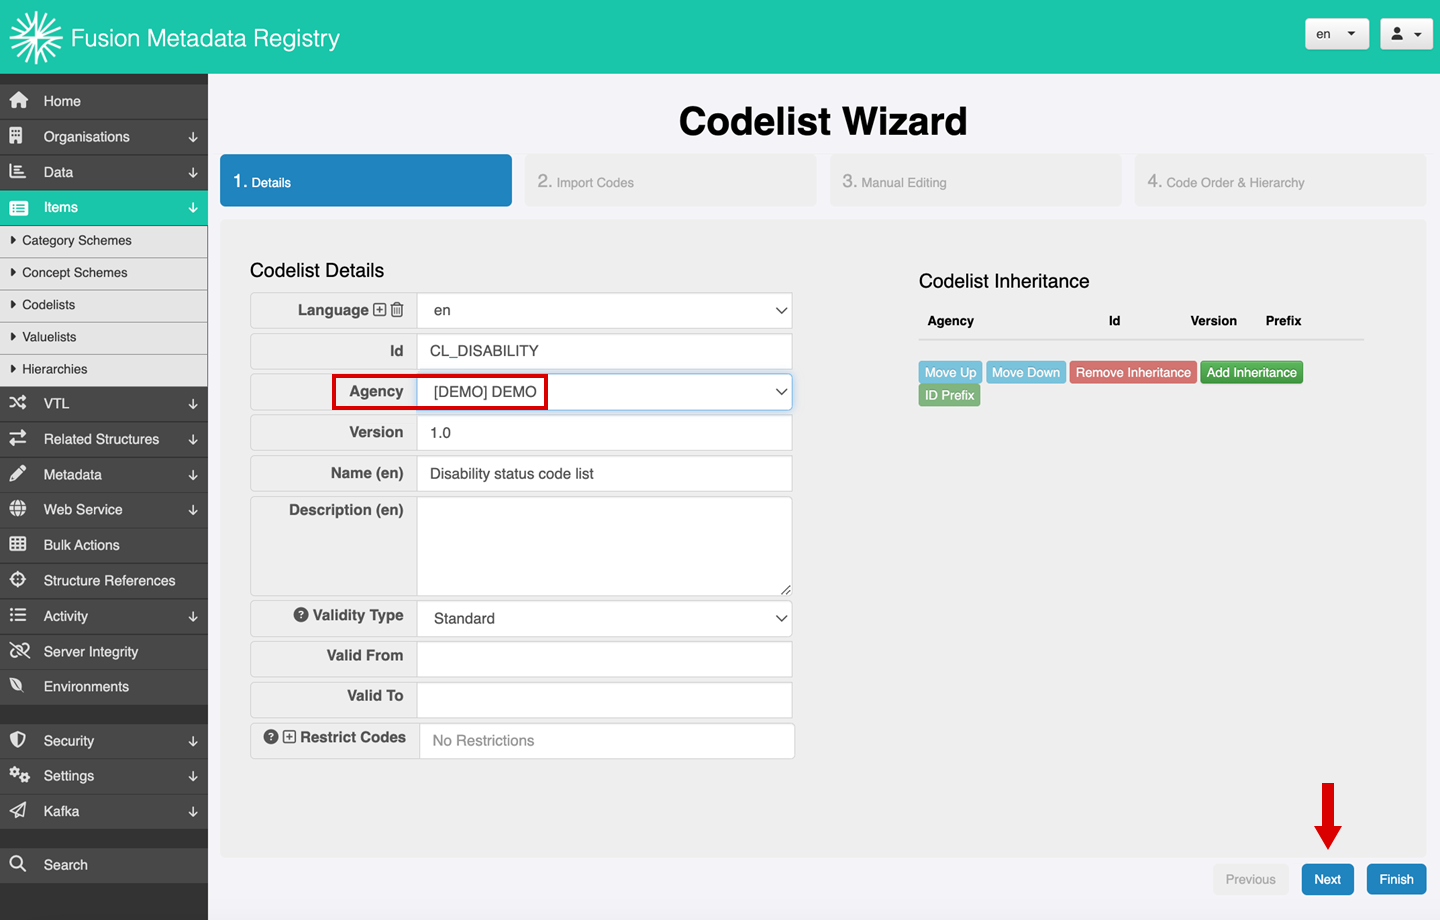
Step 5: Once the agency has been changed, select the Next button.
Select the image to enlarge. ![]()
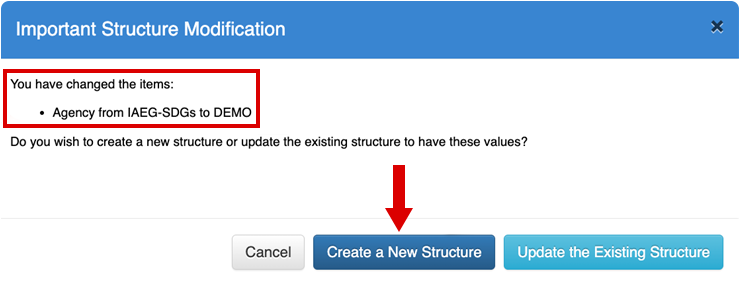
Step 6: Review the pop-up message, confirm that the agency change is correct and then select the Create a New Structure button.
Select the image to enlarge. ![]()
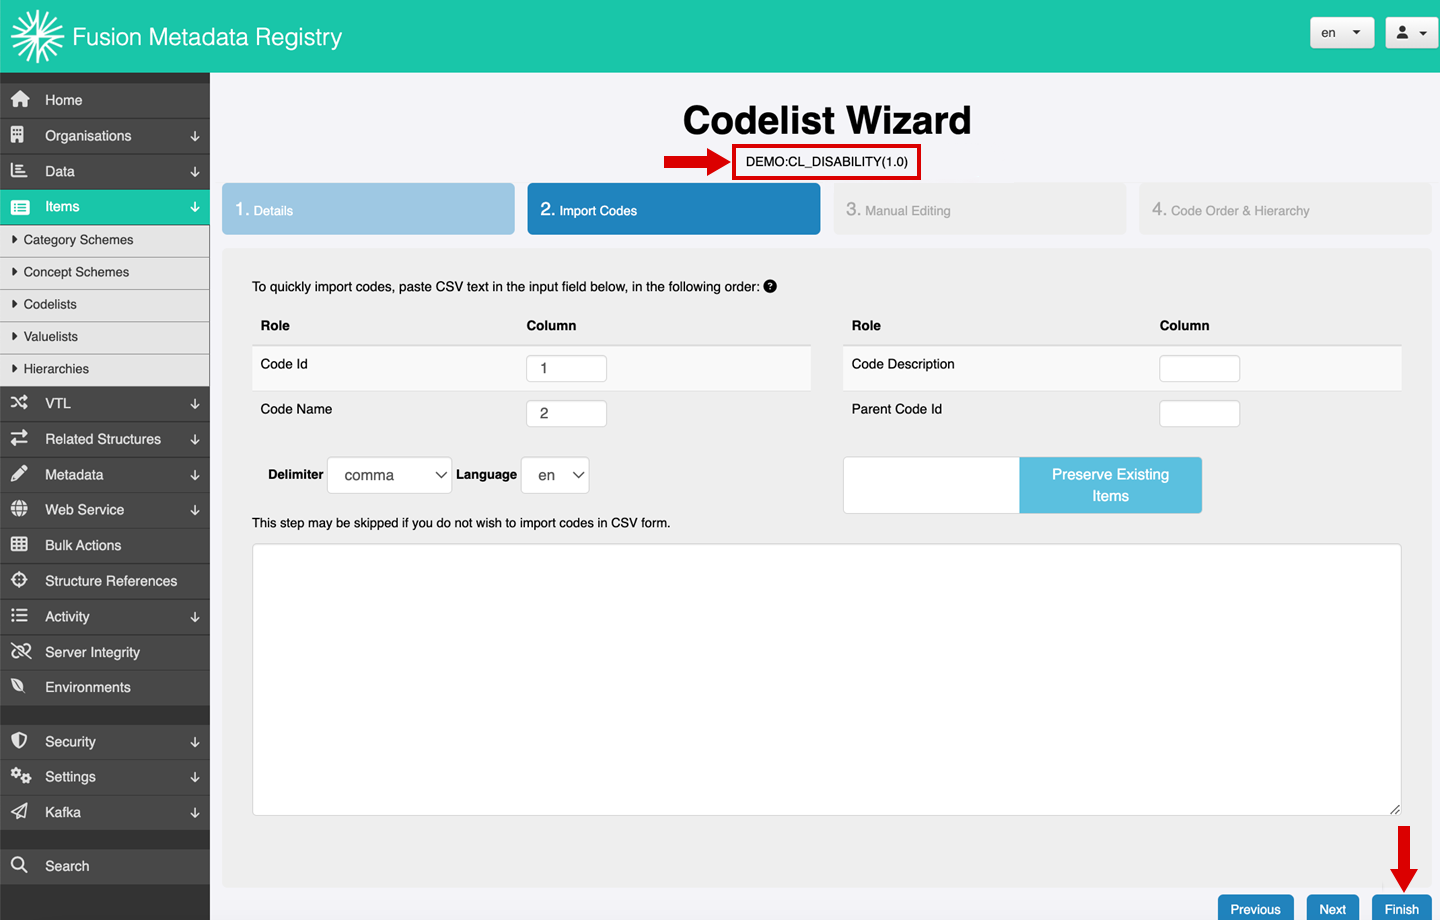
Step 7: In the following window, review the name of the codelist, confirm that the agency has changed and that the codelist is now associated with the new agency.
Step 8: If the agency is correct, select the Finish button.
Select the image to enlarge. ![]()
Step 9: Review the list of all codelists to confirm that a new codelist (e.g. CL_DISABILITY) has been created under the DEMO agency.
Select the image to enlarge. ![]()
You are now able to modify and use the codelist in your data model according to your needs.
What do you know?
You are going through the steps to take ownership and change artefacts from another agency.
Once you have changed the agency, what would your next step be?
Select your answer and then select Submit.
Once the agency has been changed, select the Next button. Review the pop-up message to confirm that the agency change is correct and then select the Create a New Structure button.
The correct answer is option 3.
Once the agency has been changed, select the Next button. Review the pop-up message to confirm that the agency change is correct and then select the Create a New Structure button.
Coming next …
In the next unit you’ll learn how to validate the integrity of an SDMX dataflow.